We get contacted quite a bit about the prospect of porting applications that were already written using the Android
API. In this quick tutorial we will walk you thru the paces of converting a simple Android application to
a Codename One application. We will also start with some basic tips covering the differences between Android &
Codename One development.
How does Codename One Differ from Android Development?
Codename One allows Android developers familiar with Java to instantly build native applications for Android,
iOS, Windows and other platforms.
Codename One has the following additional advantages besides portability:
A fast simulator – Despite recent advances in the emulator. The build process and app connection are still frustratingly slow on Android
Standard Java debugging and profiling tools
Resources are automatically scaled to the different DPI’s in the tools
No need to deal with manifests and permissions (Codename One automatically detects and applies the necessary permissions).
Notice this is implicitly Marshmallow compatible as well, so permission prompts are implicitly shown.Codename One hides the differences between versions on Android
Since Codename One doesn’t package GUI XML’s into the final product it is harder to reverse engineer a Codename One application
Component hierarchy (views) is much simpler in Codename One
Works with all major IDE’s (NetBeans, Eclipse & IntelliJ/IDEA)
All inclusive by default – no need for mixing and matching multiple disparate tools
Layouts
In Android developers build user interfaces in XML by nesting layout views and view elements one within
another (you can write Android apps in code but that isn’t as common). These elements are translated by the
compiler and in order to bind code to them you need to “find” them by their ID to use them. Codename One
differs in several ways:
You can build Codename One applications either via the GUI builder which uses a more traditional code generator
approach or write Java source code manually.Componentis Codename One’s equivalent of a view,Containerderives fromComponent(think of it as aViewGroup.All layouts are applied to the Container class essentially decoupling layout from
Containerhierarchy
E.g. Android’s linear layout is essentially very similar to the box layout in Codename One. So to arrange
components in a row in Codename One we can do something like:
Container cnt = new Container(new BoxLayout(BoxLayout.X_AXIS));
cnt.add(button1);
cnt.add(button2);
cnt.add(button3);
This can also be written as shorthand like this:
Container cnt = BoxLayout.encloseX(button1, button2, button3);
You can do the same with the GUI builder as well using simple drag and drop.
To read more about the different types of layouts and how they can be nested/used you can follow the
section on layout managers in the developer guide or check out the
layouts section in the javadocs.
Fragments
Fragments essentially solve an issue with Android which mixed Activity and View in a hierarchy creating a
somewhat complex scenario for dynamic architectures.
The concept is powerful, yet it isn’t portable, convenient or robust. Fragments become unnecessary because
of the much simpler Codename One hierarchy. Since Codename One doesn’t have a real equivalent ofActivity the UI elements don’t need it either e.g. Tabs work with Container not Activity.
Multiple DPI’s & 9-Patch Borders
Codename One supports a multi-image format which is roughly identical to the multiple DPI directories
commonly used in Android. Unlike Android the Codename One designer tool automatically scales the
images to all the resolutions (using high quality scaling algorithm) saving you the need to maintain multiple
resolution support.
The same is true with Codename One’s 9-part image borders. However, unlike Androids very elaborate
9-patch borders Codename One borders are far simpler.
Codename One uses tiling for border images (instead of scaling) and breaks the images down, it also
includes an image cutting wizard and internally cuts the images to 9-pieces.
Android’s 9-patch images are VERY powerful but also very hard to implement on all platforms in a
performant way. They are also a very difficult concept to grasp for most developers.
Activities
Codename One has its own lifecycle object which acts a bit more like an application than the activity does,
it’s somewhat simpler to program to.
Codename One supports firing intents although that is mostly Android specific and won’t work on other platforms.
You can execute arbitrary URL’s to launch external applications when necessary. Notice that iOS, Windows etc.
don’t have anything remotely close to activities.
Codename One has two different classes that match the activity. Form is the top level component that you
can “show” & transition. The main class for Codename One itself gets lifecycle events similar to the Activity
lifecycle events.
Android Specific Features
You can invoke “native” Android code from Codename One without breaking the portability of Codename One.
Follow the native code section in the developer guide to understand how this can be accomplished, you can
also see the
how do I video tutorial on the subject.
You can also add things to the manifest etc. if required by your native code.
Porting Tool
A while back we announced an open source project to ease the porting process
cn1 android importer. This is a very basic tool that just
scaffolds the new Codename One project from an Android project without really duplicating the UI or
converting the code.
We can obviously improve this tool significantly but to do so we need to gauge community interest which so
far has been “underwhelming”. I will start by using this tool as it is now to get started quickly and then port the
code.
The Application
I chose to port a really trivial application so it will be easy to follow. Specifically I chose
Swiftnotes whose source code is
available here.
I chose this application because it is simple. Making the application “pretty” isn’t a goal of this tutorial although
I tried to make the application look reasonably good while trying to stay loyal to the original design.
To give you a sense of where we are heading I’ve published the end result to
Apple itunes,
google play &
the Microsoft store as well as created a JavaScript build
which you can see to the right here (running live!) and you can launch on a
device here.
I’ve changed a few things in the final app e.g. removed the overflow, changed the icon etc. so it will look decent
in the various appstores.
The full source code of the app is here: https://github.com/codenameone/SwiftnotesCN1
The Porting Process
First we need to get the pre-requisites:
Download the Android importer from https://github.com/shannah/cn1-android-importer/blob/master/dist/ –
note that at this time the files from the lib directory should also be downloaded but this should hopefully be resolvedDownload and unzip the Swiftnotes sources from https://github.com/adrianchifor/Swiftnotes/archive/master.zip
Download NetBeans and install Codename One if you haven’t already
Step 1: Create a new Codename One Project
The instructions are for NetBeans but should work for IntelliJ as is. I’m not sure about Eclipse.
We create a standard Codename One project:
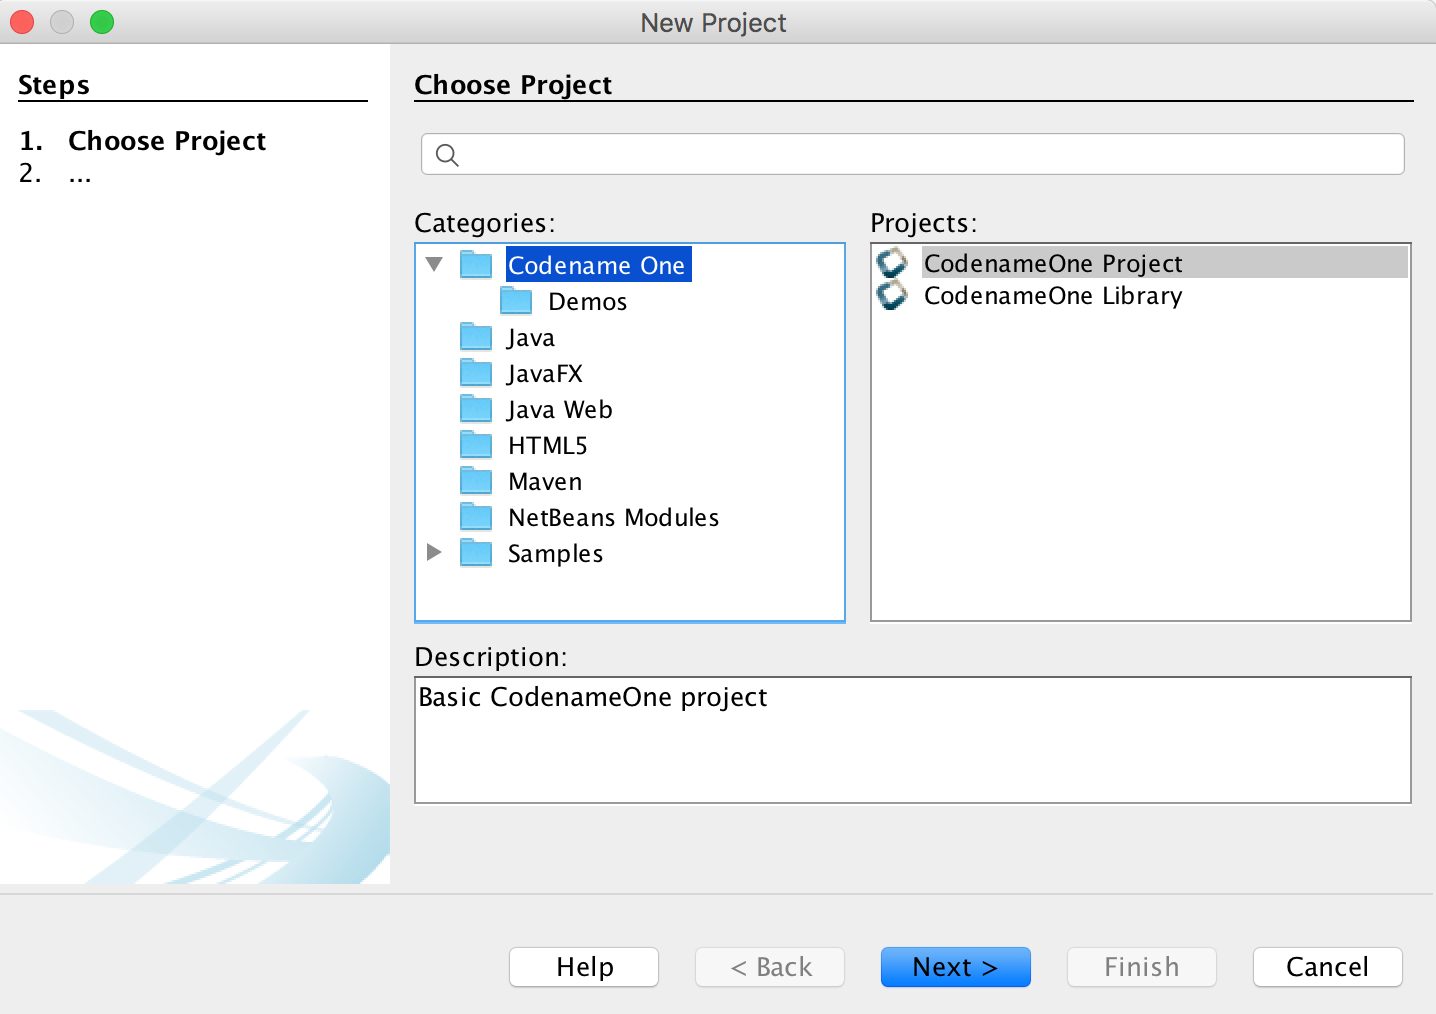
Figure 1. In the new project wizard we select Codename One
The project name doesn’t matter much I just used SwiftnotesCN1
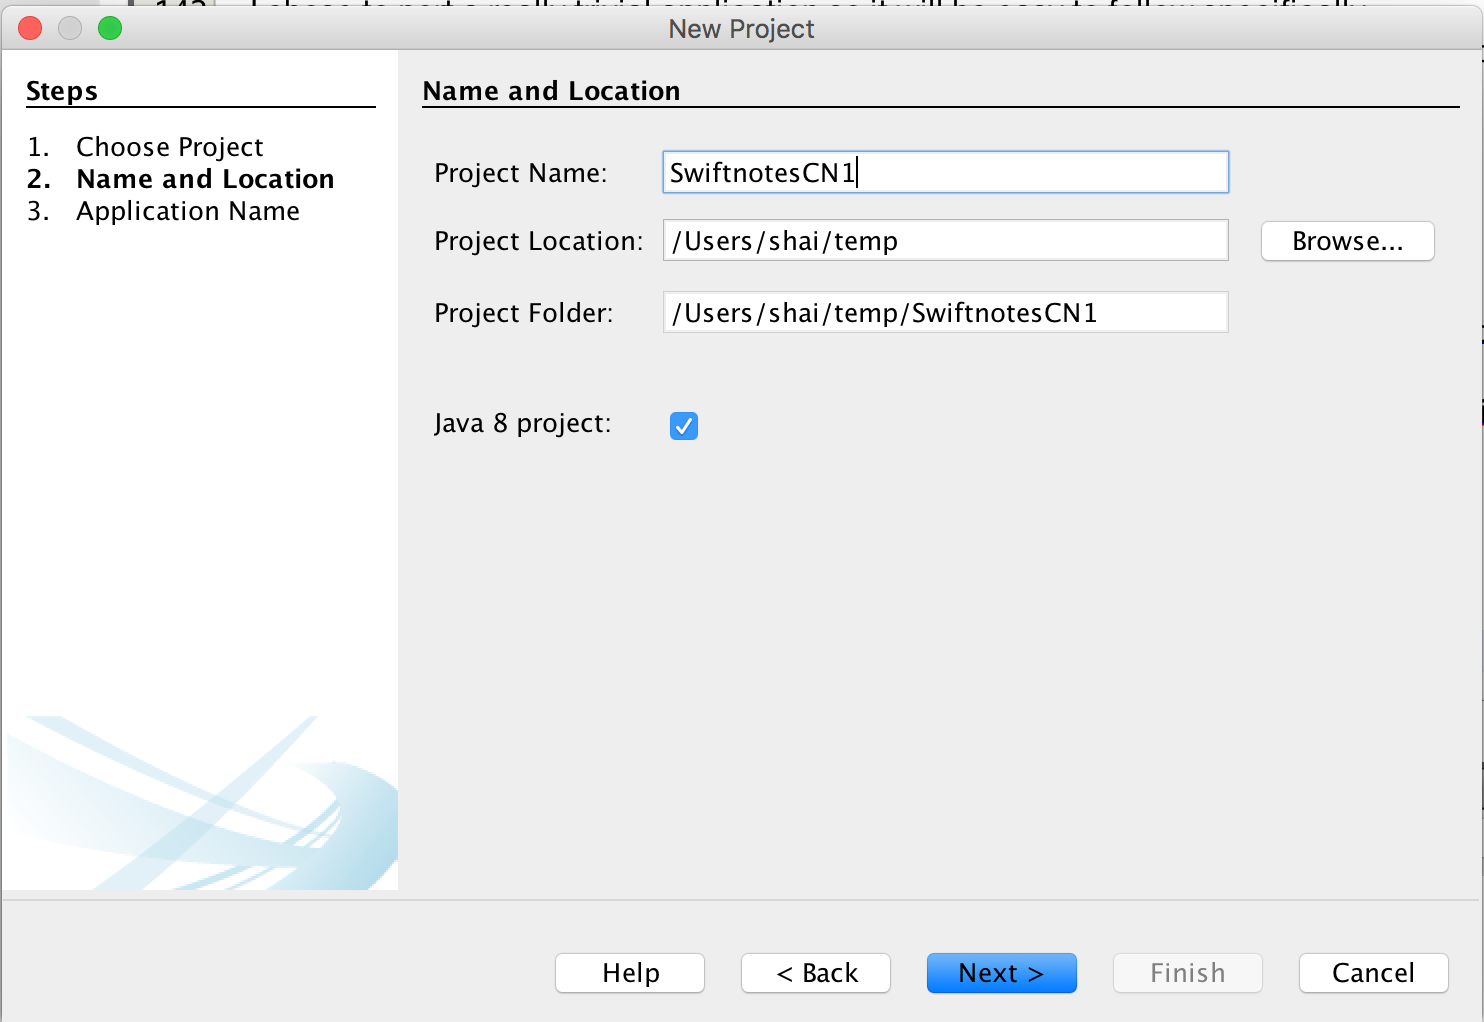
Figure 2. The project name and location
We then pick the class/package name, the package name should match the existing Android package name if
you want to replace the original project. I also picked a native theme for simplicity and the barebone application
to start from scratch:
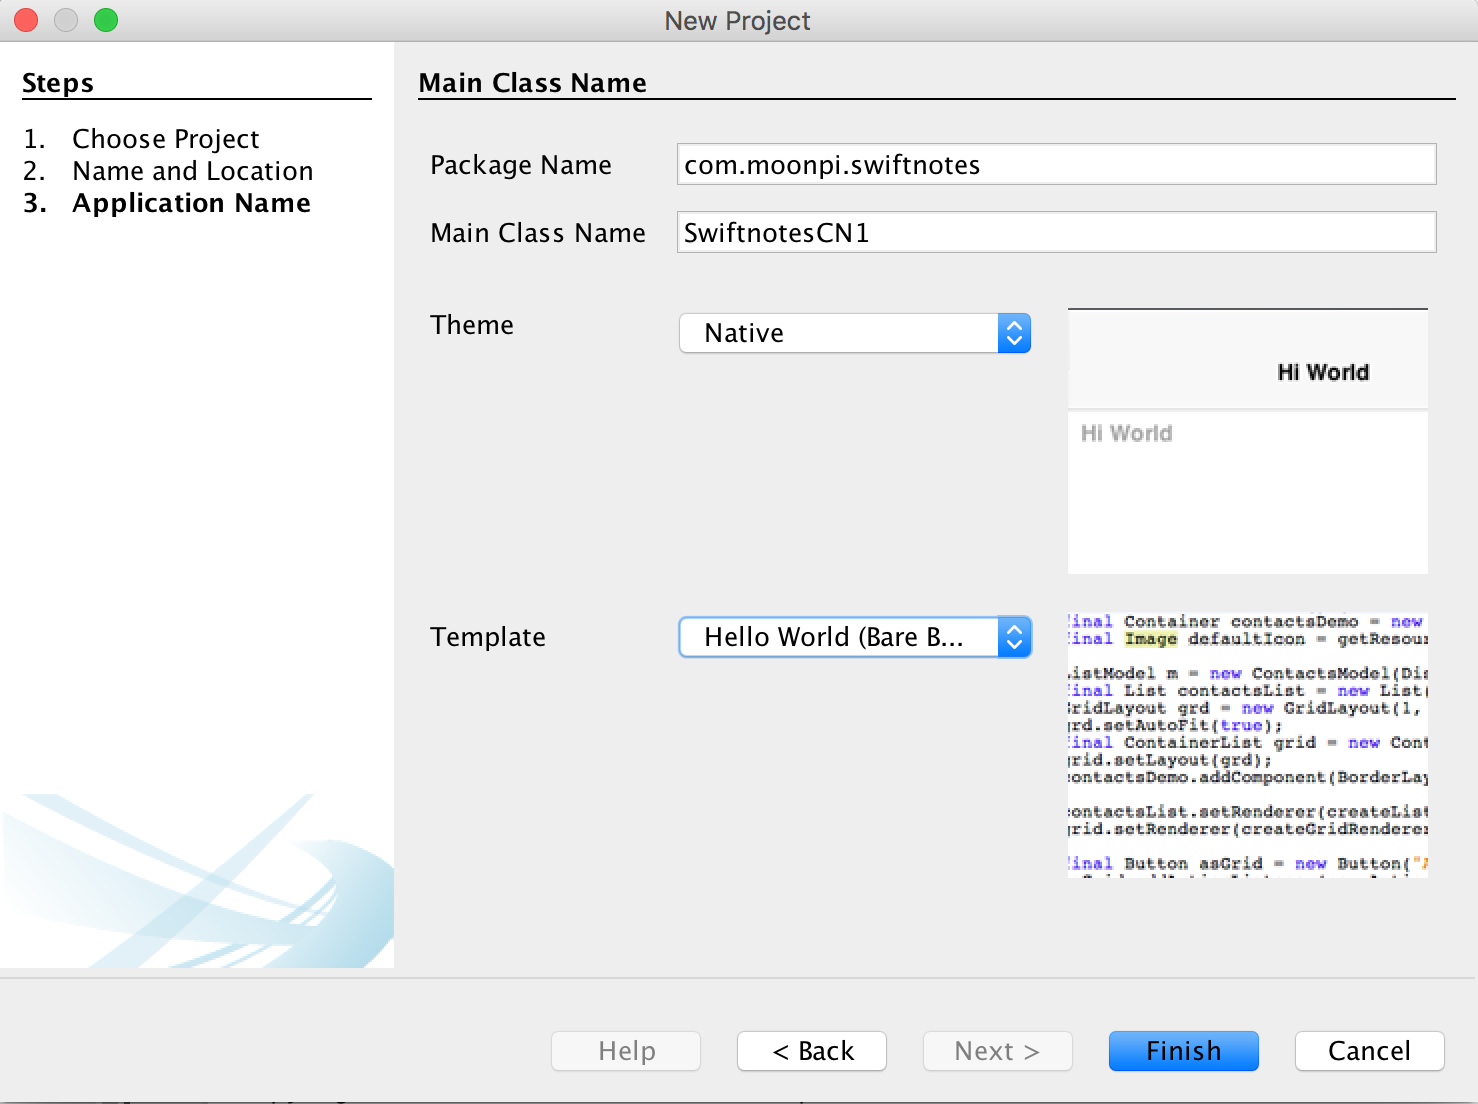
Figure 3. We should use the same package name as the android project
| __ | After doing this I chose to refactor the app to the com.codename1 package space so we can run it side by side with the native app |
|---|
Step 2: Run the Conversion Tool
The conversion tool is very simplistic and preliminary. It had issues with some of the UI elements even with
it’s limited support for these features.
| __ | If you show enough interest, file issues we’ll fix them and move this tool forward |
|---|
I used the following command to convert the project:
java -jar AndroidImporter.jar import-project -i Swiftnotes-master/app/src/main/res -o ~/dev/SwiftnotesCN1 -p com.moonpi.swiftnotes
The first argument is the resource directory for the original Android project. Followed by the output directory
(the new Codename One project) and the package name where GUI files should be created.
This placed the localization bundles and imported the images, it also generated the GUI XML files.
To generate the GUI sources right click the project and select “build” this will generate GUI source files for
all the XML files.
Step 3: Bind Localization Code
This is really trivial and will allow us to see something running almost at once, open the main class in our caseSwiftnotesCN1. Edit the init(Object) method to load the localization Strings:
public void init(Object context) {
    theme = UIManager.initFirstTheme("/theme");

    Map<String, String> v = theme.getL10N("strings", L10NManager.getInstance().getLanguage());
    if(v == null) {
        v = theme.getL10N("strings", "en");
    }
    UIManager.getInstance().setBundle(v);

    // Enable Toolbar on all Forms by default
    Toolbar.setGlobalToolbar(true);

    // Pro only feature, uncomment if you have a pro subscription
    Log.bindCrashProtection(true);
}
To see/edit the Strings in the app double click the theme.res file in the root of the project
and select the localization section.
Interlude: The GUI Builder
The wizard generates GUI builder XML files that are “hidden” under the res/guibuilder directory and must
correspond to Java source files. They carry the .gui extension and use a relatively simple format of hierarchy/layout.
You can edit the XML files but if you remove the java files they will be regenerated. You need to remove/move
the XML & Java files together if you want to work with both.
Currently the generator doesn’t generate much as it can’t replicate the layout and Android is too different from
Codename One, but it’s a starting point.
Step 4: Fix the Main Activity Form
The generated code derives from Container instead of Form since Android doesn’t have an equivalent of
Codename One’s concept of a top level component. We can just edit the ActivityMain class to derive fromForm instead of Container (you can also do that in the .gui XML file but it’s not essential).
We can now right click the MainActivity.java file and select the GUI builder option which should open
this UI:
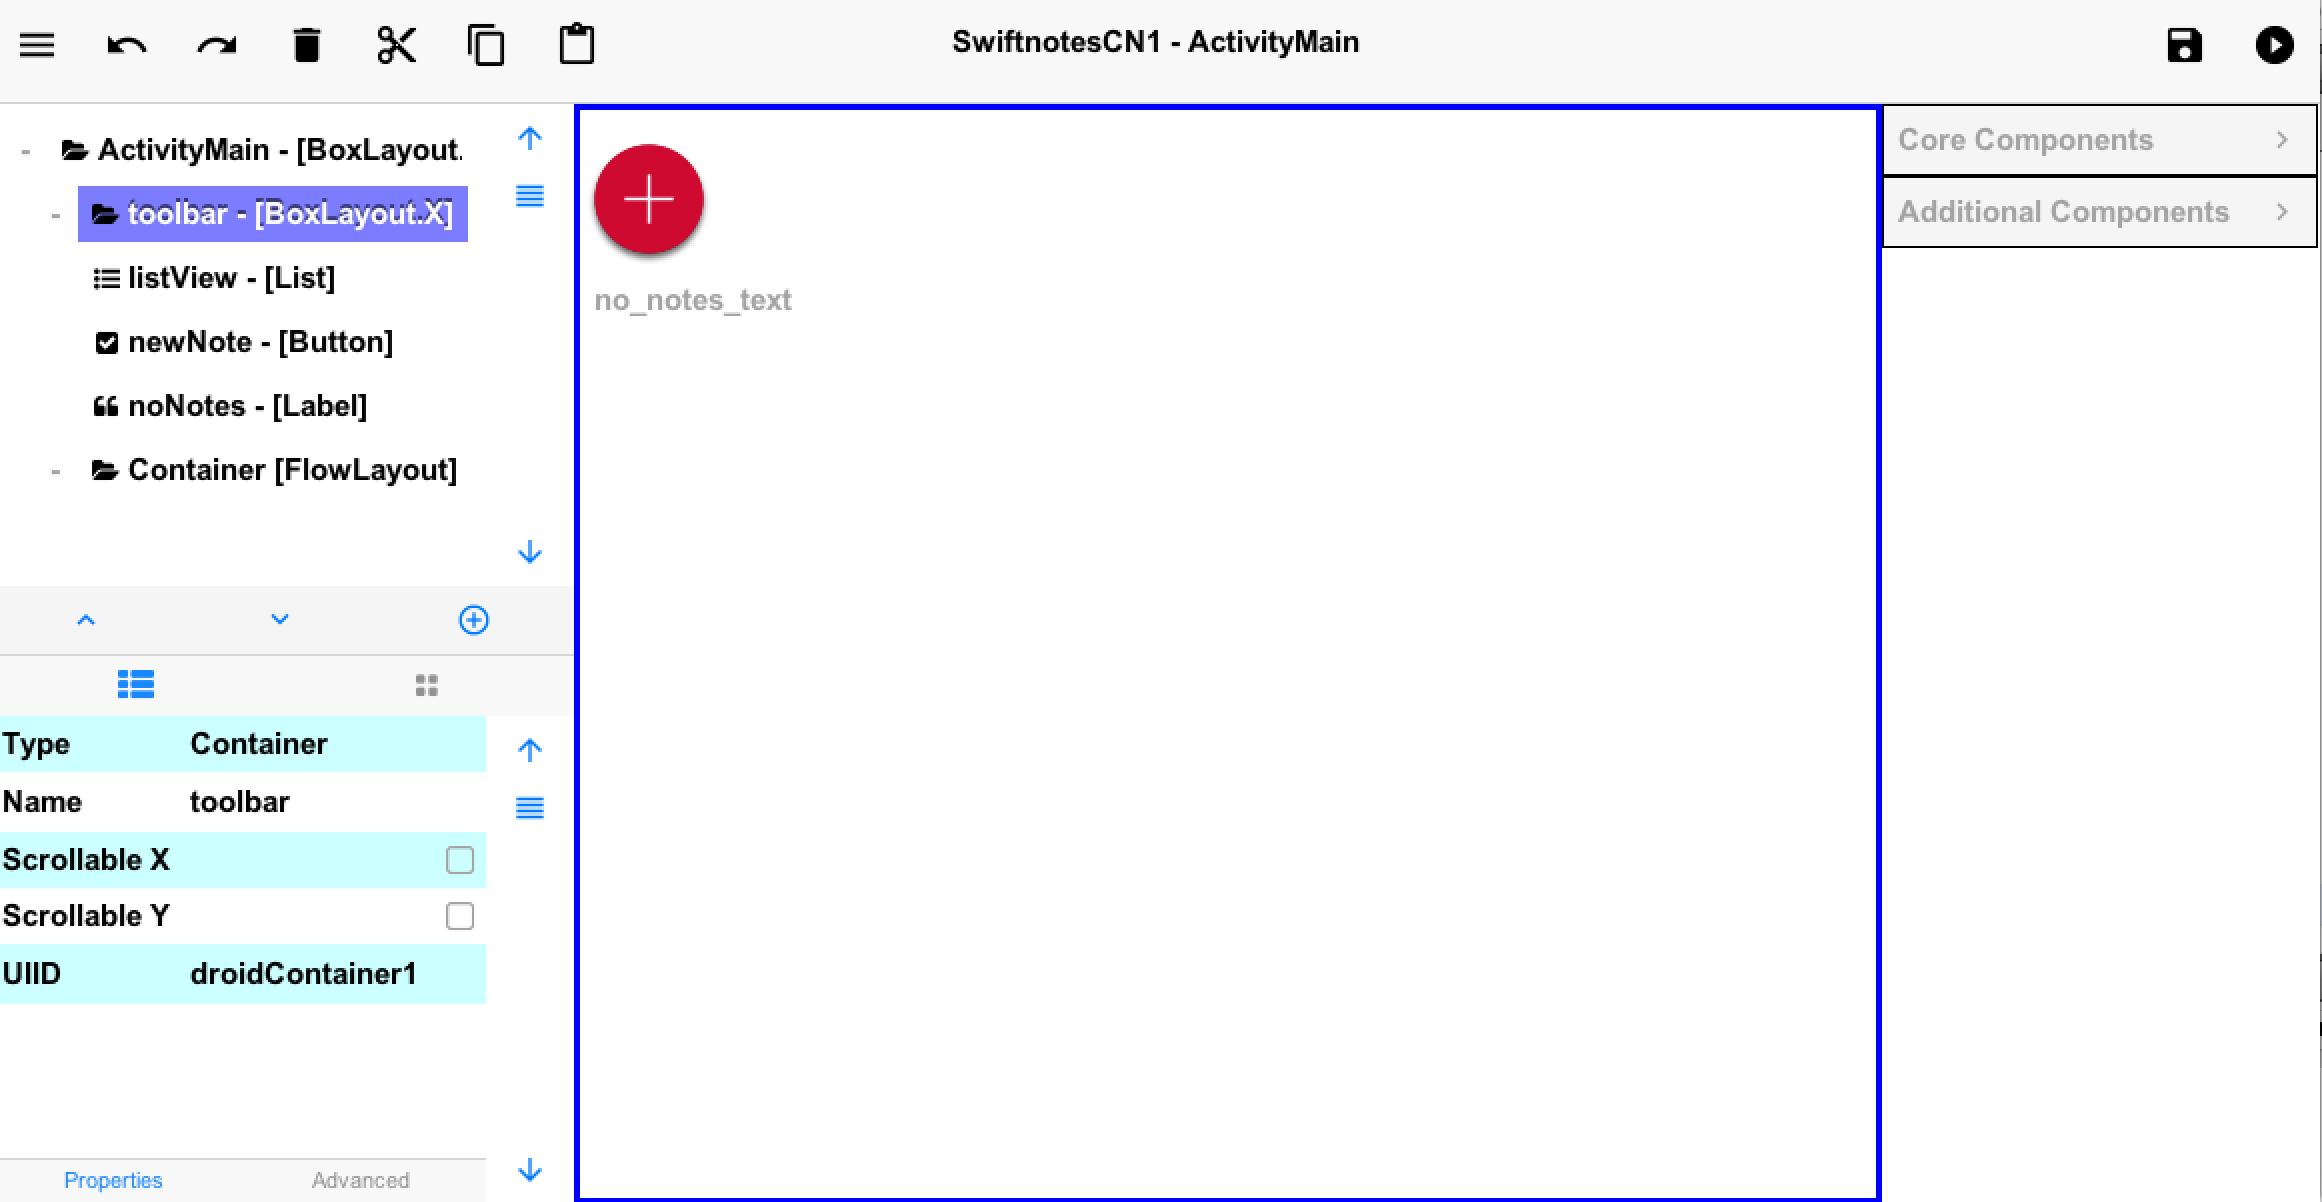
Figure 4. Main Activity UI as it is generated
This looks a bit weird but if we look at the Android XML this starts to make sense:
<?xml version="1.0" encoding="utf-8"?>
<RelativeLayout
    xmlns_android="http://schemas.android.com/apk/res/android"
    xmlns_tools="http://schemas.android.com/tools"
    android_layout_width="match_parent"
    android_layout_height="match_parent"
    android_animateLayoutChanges="true"
    tools_context=".MainActivity"
    android_background="@color/background_white" >

    <include
        android_id="@+id/toolbarMain"
        layout="@layout/toolbar"/>

    <ListView
        android_layout_width="match_parent"
        android_layout_height="match_parent"
        android_id="@+id/listView"
        android_divider="@null"
        android_dividerHeight="8dp"
        android_drawSelectorOnTop="true"
        android_fastScrollEnabled="true"
        android_scrollbarStyle="outsideOverlay"
        android_paddingRight="16dp"
        android_paddingLeft="16dp"
        android_clipToPadding="false"
        android_layout_alignParentLeft="true"
        android_layout_alignParentRight="true"
        android_layout_alignParentBottom="true"
        android_layout_below="@+id/toolbarMain"
        android_paddingTop="8dp"
        android_paddingBottom="8dp" />

    <ImageButton
        android_layout_width="65dp"
        android_layout_height="65dp"
        android_id="@+id/newNote"
        android_scaleType="fitXY"
        android_background="@drawable/ic_new_selector"
        android_layout_marginBottom="30dp"
        android_layout_marginRight="30dp"
        android_layout_alignParentBottom="true"
        android_layout_alignParentRight="true"
        android_contentDescription="@string/new_note_content_description" />

    <TextView
        android_layout_width="wrap_content"
        android_layout_height="wrap_content"
        android_id="@+id/noNotes"
        android_textAppearance="?android:attr/textAppearanceLarge"
        android_text="@string/no_notes_text"
        android_textColor="@color/theme_primary"
        android_textStyle="bold"
        android_layout_alignParentLeft="true"
        android_layout_alignParentRight="true"
        android_layout_alignParentStart="true"
        android_layout_alignParentEnd="true"
        android_gravity="center"
        android_layout_marginLeft="8dp"
        android_layout_marginRight="8dp"
        android_layout_centerInParent="true"
        android_visibility="invisible" />

    <View
        android_layout_width="match_parent"
        android_layout_height="@dimen/shadow_elevation"
        android_layout_below="@+id/toolbarMain"
        android_layout_alignParentRight="true"
        android_layout_alignParentLeft="true"
        android_background="@drawable/drop_shadow" />

</RelativeLayout>
Above we have these elements:
Toolbar– this is builtin to Codename One with theToolbarclassListView– Codename One doesn’t recommend lists and instead uses box layout so we will use aContainerImageButton& Shadow – this is used to provide the floating action button, this is builtin to Codename OneTextView– used to show content when the view is empty. We will have a special case for it in theContainer
Notice that there is a toolbar.xml file included but it doesn’t include anything important just theme stuff and
nothing of value to us.
All of these elements except for the text view are useless to us:
The
Toolbaris builtin to Codename OneWe should avoid lists and instead use
BoxLayoutContainerWe have a builtin
FloatingActionButtonso we don’t need that.
So we will delete everything except for the text. We will also verify that the layout is BoxLayout.Y_AXIS (it should
already be with that layout).
One important thing we need to do is select the root form and make sure its UIID property is Form otherwise
the converter will try to assign the default UIID’s from Android which won’t work well.
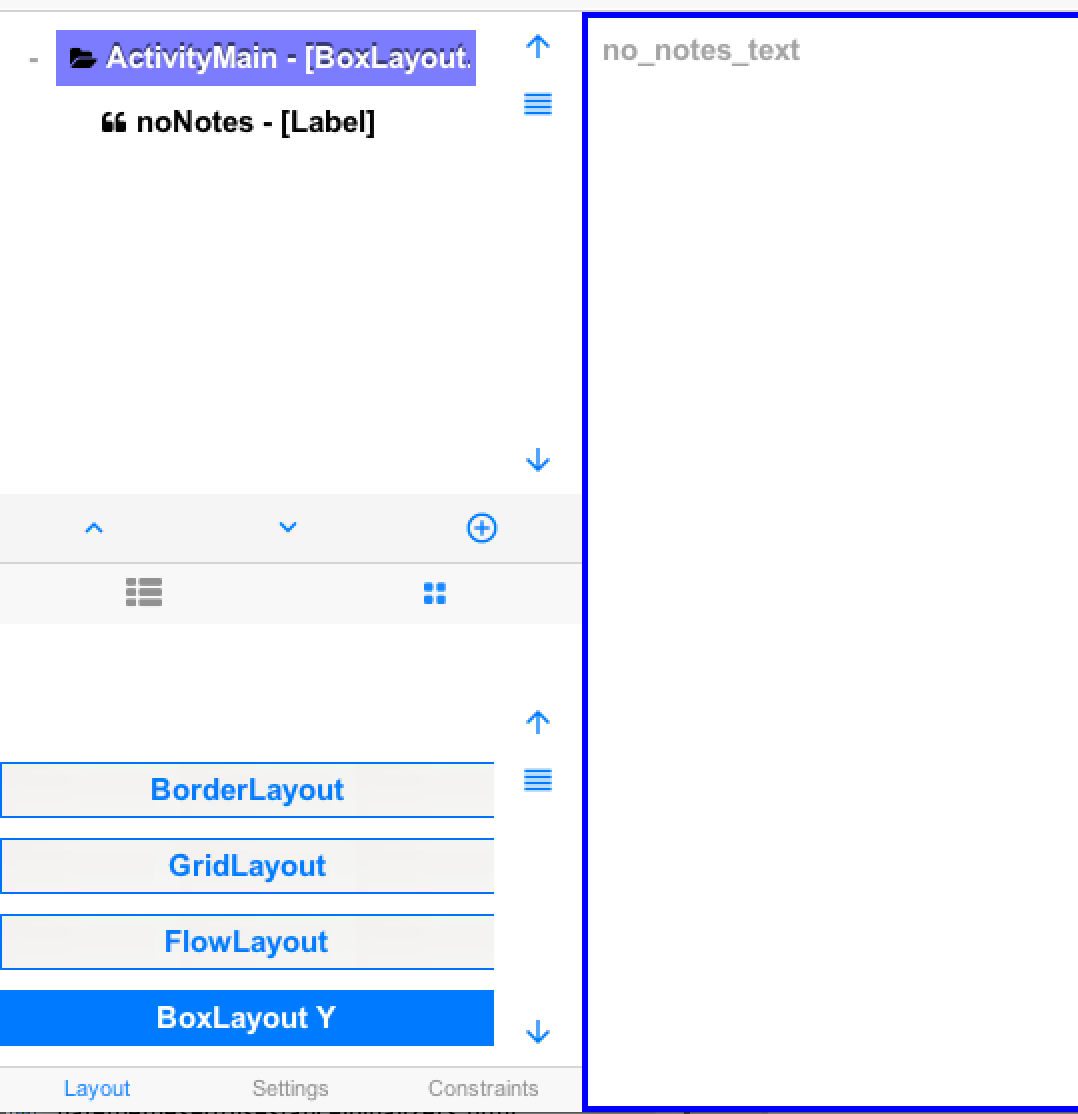
Figure 5. After removing all the redundant stuff…
We save and open the Java source file, then edit the constructor to include the FloatingActionButton as well
as the proper title. So we change this:
public ActivityMain(com.codename1.ui.util.Resources resourceObjectInstance) {
    initGuiBuilderComponents(resourceObjectInstance);
}
To this:
public ActivityMain(com.codename1.ui.util.Resources resourceObjectInstance) {
    super("app_name");

    initGuiBuilderComponents(resourceObjectInstance);

    FloatingActionButton fab = FloatingActionButton.createFAB(FontImage.MATERIAL_ADD);
    fab.bindFabToContainer(getContentPane());

    getToolbar().addSearchCommand(e -> Log.p("Todo"));
    getToolbar().addCommandToOverflowMenu("Backup Notes", null, e -> Log.p("Todo"));
    getToolbar().addCommandToOverflowMenu("Restore Notes", null, e -> Log.p("Todo"));
    getToolbar().addCommandToOverflowMenu("Rate App", null, e -> Log.p("Todo"));
}
It should be mostly self explanatory and should construct the main UI.
Step 5: Run
To see what we have we can just edit the main class ( SwiftnotesCN1 ) and replace this code:
Form hi = new Form("Hi World");
hi.addComponent(new Label("Hi World"));
hi.show();
With this:
new ActivityMain(theme).show();
The end result still needs styling which we will do in the next step.
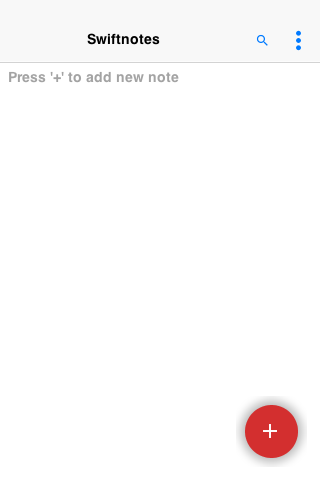
Figure 6. Before styling the result
Step 6: Styling the UI
We style the UI using the designer tool, there are other options such as
CSS but I find the designer tool to be simpler
and more consistent.
To launch the designer double click the theme.res file in the src root. Select the Theme entry and press the
Add button in the bottom of the theme. In the Combo Box at the top of the Add dialog type “Toolbar”.
Select the Color tab.
Next uncheck Derive Background and paste the color (which I got from the colors.xml file of the original
Android project) CE0A31. Then uncheck Derive Transparency and set the value to 255.
Next select the Border tab, uncheck Derive click the … button and select Empty in the combo box.
Next select the Padding tab, uncheck Derive and leave everything as 0.
You should end up with something like this and a red background title:
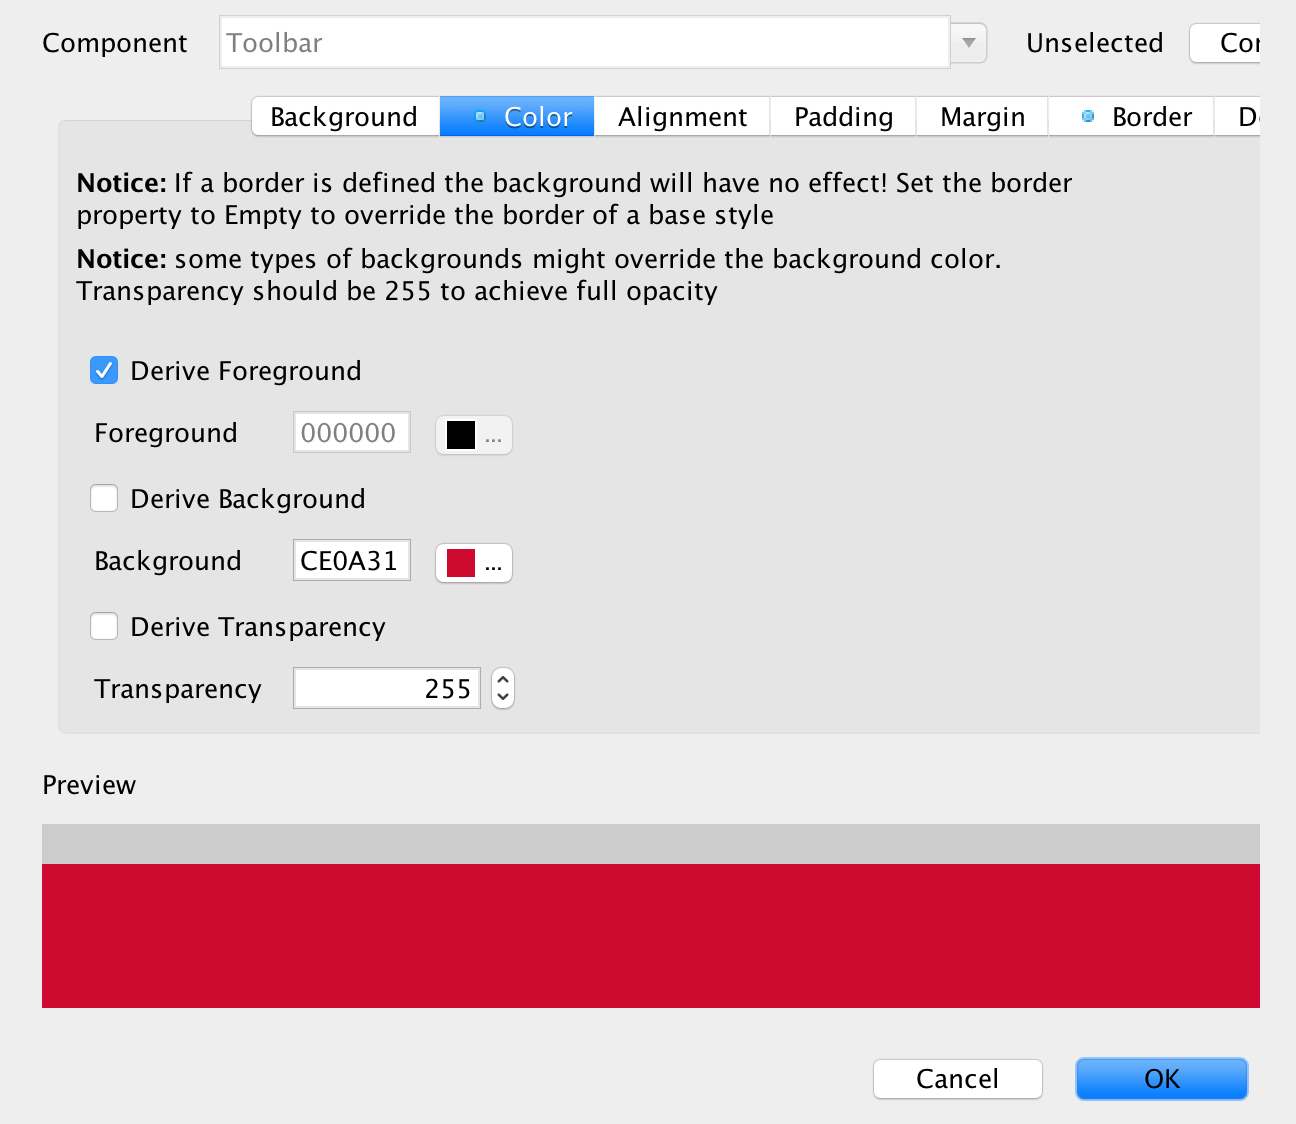
Figure 7. Setup of the Toolbar UIID
Next we setup the foreground colors and fonts for the title elements, for brevity I will summerize the elements
that need changing.
Add a “Title” entry with the following properties:
Foreground Color ffffff
Background Transparency 0
Font True Type = native:MainLight (this will map to Roboto/Helvetic Neue respectively)
True Type Size = 4 millimeters
After saving this copy and paste this entry as TitleCommand & MenuButton.
Last but not least we will add a StatusBar UIID with:
Background color of B00A31
Background Transparency 255
We now have this which is already starting to look like an app:
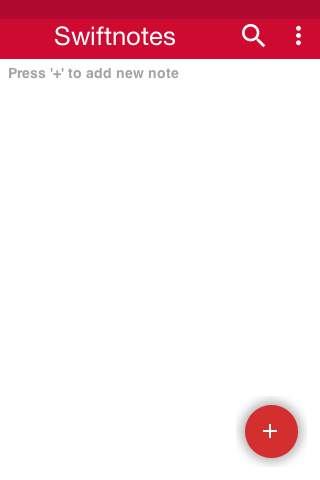
Figure 8. After styling the title
Step 7: Convert the Functionality
The other UI elements are too simple and often inconsistent so we’ll just delete the corresponding .gui & .java
files representing those other widgets and implement them dynamically. This is especially crucial since the original
app has some “androidisms” embedded into it making the code conversion challenging.
E.g. the original app didn’t include a Note business object abstraction which is pretty basic so we added that
to get started:
public class Note implements Externalizable {
    private static ArrayList<Note> notes;

    private String title = "";
    private String body = "";
    private boolean bodyHidden;
    private boolean starred;
    private int color = 0xffffff;
    private float fontSize = 2;
    private boolean deleted;

    /**
     * @return the title
     */
    public String getTitle() {
        return title;
    }

    /**
     * @param title the title to set
     */
    public void setTitle(String title) {
        this.title = title;
    }

    /**
     * @return the body
     */
    public String getBody() {
        return body;
    }

    /**
     * @param body the body to set
     */
    public void setBody(String body) {
        this.body = body;
    }

    /**
     * @return the bodyHidden
     */
    public boolean isBodyHidden() {
        return bodyHidden;
    }

    /**
     * @param bodyHidden the bodyHidden to set
     */
    public void setBodyHidden(boolean bodyHidden) {
        this.bodyHidden = bodyHidden;
    }

    /**
     * @return the starred
     */
    public boolean isStarred() {
        return starred;
    }

    /**
     * @param starred the starred to set
     */
    public void setStarred(boolean starred) {
        this.starred = starred;
    }

    /**
     * @return the color
     */
    public int getColor() {
        return color;
    }

    /**
     * @param color the color to set
     */
    public void setColor(int color) {
        this.color = color;
    }

    /**
     * @return the fontSize
     */
    public float getFontSize() {
        return fontSize;
    }

    /**
     * @param fontSize the fontSize to set
     */
    public void setFontSize(float fontSize) {
        this.fontSize = fontSize;
    }

    @Override
    public int getVersion() {
        return 1;
    }

    @Override
    public void externalize(DataOutputStream out) throws IOException {
        Util.writeUTF(title, out);
        Util.writeUTF(body, out);
        out.writeBoolean(bodyHidden);
        out.writeBoolean(starred);
        out.writeInt(color);
        out.writeFloat(fontSize);
    }

    @Override
    public void internalize(int version, DataInputStream in) throws IOException {
        title = Util.readUTF(in);
        body = Util.readUTF(in);
        bodyHidden = in.readBoolean();
        starred = in.readBoolean();
        color = in.readInt();
        fontSize = in.readFloat();
    }

    @Override
    public String getObjectId() {
        return "Note";
    }

    public static ArrayList<Note> getNotes() {
        if(notes == null) {
            notes = (ArrayList<Note>)Storage.getInstance().readObject("notes");
            if(notes == null) {
                notes = new ArrayList<>();
            }
        }
        return notes;
    }

    public void saveNote() {
        if(!notes.contains(this)) {
            notes.add(this);
        }
        Storage.getInstance().writeObject("notes", notes);
    }

    public void delete() {
        notes.remove(this);
        deleted = true;
        Storage.getInstance().writeObject("notes", notes);
    }

    public boolean isDeleted() {
        return deleted;
    }
}
Notice that this class encapsulates all the handling/storage of notes, I kept it as simple as possible to avoid
any complexities and just implemented simple serialization for persistence.
Once we have that abstraction everything else becomes trivial, all we need is a single additional class we
have below:
public class EditNote extends Form {
    private static final int[] COLORS = {
        0x44a1eb, 0x77ddbb, 0xbbe535,
        0xeeee22, 0xffbb22, 0xf56545,
        0xff5997, 0xa767ff, 0xffffff
    };

    Command hideShowCommand;

    public EditNote(Note n, boolean isNew, ActivityMain parentForm) { __**(1)**
        super("", new BorderLayout()); __**(2)**
        TextField title = new TextField(n.getTitle(), "Title", 20, TextArea.ANY);
        TextArea body = new TextArea(n.getBody());
        body.setHint("Note");
        title.getHintLabel().setUIID("NoteTitle");
        title.getHintLabel().getAllStyles().setFgColor(0xcccccc);
        add(BorderLayout.NORTH, title);
        add(BorderLayout.CENTER, body);
        title.setUIID("NoteTitle");
        body.setUIID("NoteBody");
        Font fnt = body.getUnselectedStyle().getFont(); __**(3)**
        body.getAllStyles().setFont(fnt.derive(Display.getInstance().convertToPixels(n.getFontSize()), Font.STYLE_PLAIN));
        getContentPane().getUnselectedStyle().setBgTransparency(255);
        getContentPane().getUnselectedStyle().setBgColor(n.getColor());

        getToolbar().addMaterialCommandToRightBar("", FontImage.MATERIAL_PALETTE, e -> {
            Dialog colorPicker = new Dialog("dialog_note_colour"); __**(4)**
            colorPicker.setDisposeWhenPointerOutOfBounds(true);
            colorPicker.setBackCommand("", null, ee -> colorPicker.dispose());
            colorPicker.setLayout(new GridLayout(3, 3));
            for(int iter = 0 ; iter < COLORS.length ; iter++) {
                Button choose = new Button("");
                Style s = choose.getAllStyles();
                s.setAlignment(Component.CENTER);
                int color = COLORS[iter];
                s.setBorder(RoundBorder.create().color(color));
                if(color == getContentPane().getUnselectedStyle().getBgColor()) {
                    FontImage.setMaterialIcon(choose, FontImage.MATERIAL_CHECK_CIRCLE, 3.5f);
                }
                choose.addActionListener(ee -> {
                    colorPicker.dispose();
                    getContentPane().getUnselectedStyle().setBgColor(color);
                    repaint();
                });
                colorPicker.add(choose);
            }
            colorPicker.showPacked(BorderLayout.CENTER, true);
        });

        getToolbar().setBackCommand("", e -> {
            n.setTitle(title.getText()); __**(5)**
            n.setBody(body.getText());
            n.setColor(getContentPane().getUnselectedStyle().getBgColor());
            if(isNew) {
                if(Dialog.show("Save Changes", "", "Yes", "No")) {
                    n.saveNote();
                    parentForm.addNote(n);
                }
            } else {
                n.saveNote();
            }
            parentForm.showBack();
        });

        getToolbar().addMaterialCommandToOverflowMenu("Font Size", FontImage.MATERIAL_FORMAT_SIZE, e -> {
            Slider s = new Slider(); __**(6)**
            s.setMinValue(0);
            s.setMaxValue(50);
            s.setProgress(Math.round(n.getFontSize() * 10));
            s.setEditable(true);
            InteractionDialog id = new InteractionDialog();
            id.setUIID("Dialog");
            id.setLayout(new BorderLayout());
            id.add(BorderLayout.CENTER, s);
            s.addDataChangedListener((i, ii) -> {
                n.setFontSize(1 + ((float)s.getProgress()) / 10.0f);
                body.getAllStyles().setFont(fnt.derive(Display.getInstance().convertToPixels(n.getFontSize()), Font.STYLE_PLAIN));
                body.repaint();
            });
            Button ok = new Button("OK");
            id.add(BorderLayout.SOUTH, ok);
            ok.addActionListener(ee -> id.dispose());
            id.show(getLayeredPane().getHeight() - Display.getInstance().convertToPixels(10), 0, 0, 0);
        });

        addHideShowCommand(n);
    }

    void addHideShowCommand(Note n) { __**(7)**
        if(hideShowCommand != null) {
            getToolbar().removeOverflowCommand(hideShowCommand);
        }
        if(n.isBodyHidden()) {
            hideShowCommand = getToolbar().addMaterialCommandToOverflowMenu("Show Body", FontImage.MATERIAL_VISIBILITY, e -> {
                    n.setBodyHidden(false);
                    addHideShowCommand(n);
                });
        } else {
            hideShowCommand = getToolbar().addMaterialCommandToOverflowMenu("Hide Body", FontImage.MATERIAL_VISIBILITY_OFF, e -> {
                    n.setBodyHidden(true);
                    addHideShowCommand(n);
                });
        }
    }
}
I mixed several concepts from the original code (e.g. the color picker etc) into a single entry.
__1 | The constructor of the form accepts the parent form and whether this is a new note. We need this
| to determine whether to add a new note when going back. | |
|---|---|
| __2 | We use border layout which allows us to place the title in the north and the body in the center. This is |
| very convenient to take up available space | |
| __3 | We set some UI elements directly instead of via UIID setting in the designer, this allows us to modify |
| things in runtime and is sometimes more convenient than going thru the design tool. In this case | |
| we need to set the font size that might differ per note | |
| __4 | The color picker dialog is just a regular dialog with a grid layout that shows a round border to give the |
| color options. Since the code was so simple I didn’t see the need to move it to another class. | |
| __5 | The back command does the save operation for consistency with the original app. Personally I would rather |
| have a check option to save rather than show a dialog but I preferred consistency over personal preference | |
| __6 | Instead of 3 hardcoded sizes I chose to show a slider in an interaction dialog that allows editing the UI while |
| working with the dialog. This creates a nice effect where you can drag the slider and instantly see the font grow/shrink | |
| __7 | The command in the overflow menu changes based on state so I placed this in a separate method so it can be |
| removed/re-added |
Now comes the point of binding this together into the first form… We’ll change the constructor to this:
public ActivityMain(com.codename1.ui.util.Resources resourceObjectInstance) {
    super("app_name");
    initGuiBuilderComponents(resourceObjectInstance);
    FloatingActionButton fab = FloatingActionButton.createFAB(FontImage.MATERIAL_ADD);
    fab.bindFabToContainer(getContentPane());
    fab.addActionListener(e -> { __**(1)**
        Note n = new Note();
        new EditNote(n, true, ActivityMain.this).show();
    });

    ArrayList<Note> notes = Note.getNotes(); __**(2)**
    if(notes.size() > 0) {
        removeAll();
        for(Note n : notes) {
            addNote(n);
        }
    }

    getToolbar().addSearchCommand(e -> search((String)e.getSource())); __**(3)**
    getToolbar().addCommandToOverflowMenu("Backup Notes", null, e -> Log.p("Todo"));
    getToolbar().addCommandToOverflowMenu("Restore Notes", null, e -> Log.p("Todo"));
    getToolbar().addCommandToOverflowMenu("Rate App", null, e -> Log.p("Todo"));
}
There are several interesting things here:
| __1 | We listen to an event on the floating action button then launch the new edit UI code |
|---|---|
| __2 | We load the notes and place them into the UI, I’ll get into addNote below |
| __3 | Search is one line of code which we list below |
Lets start with add/create note which is one of the trickier methods here:
private Container createNoteCnt(Note n) {
    Button title = new Button(n.getTitle()); __**(1)**
    title.setUIID("NoteTitle");
    CheckBox star = CheckBox.createToggle(""); __**(2)**
    star.setUIID("NoteTitle");
    FontImage.setMaterialIcon(star, FontImage.MATERIAL_STAR_BORDER, 4);
    star.setPressedIcon(FontImage.createMaterial(FontImage.MATERIAL_STAR, "NoteTitle", 4));
    star.setSelected(n.isStarred());
    star.setBlockLead(true);
    star.addActionListener(e -> {
        n.setStarred(star.isSelected());
        n.saveNote();
    });
    Container cnt;
    if(!n.isBodyHidden()) { __**(3)**
        TextArea body = new TextArea(n.getBody());
        body.getAllStyles().setBgColor(n.getColor());
        body.setUIID("NoteBody");
        body.setEditable(false);
        Font fnt = body.getUnselectedStyle().getFont();
        body.getAllStyles().setFont(fnt.derive(Display.getInstance().convertToPixels(n.getFontSize()), Font.STYLE_PLAIN));
        cnt = BorderLayout.center(
                    BoxLayout.encloseY(title, body)
                ).add(BorderLayout.EAST, star);
    } else {
        cnt = BorderLayout.center(title).
                        add(BorderLayout.EAST, star);
    }
    cnt.setLeadComponent(title);
    cnt.getAllStyles().setBgTransparency(255); __**(4)**
    cnt.getAllStyles().setBgColor(n.getColor());
    Button delete = new Button("");
    FontImage.setMaterialIcon(delete, FontImage.MATERIAL_DELETE, 4);
    SwipeableContainer sc = new SwipeableContainer(delete, cnt); __**(5)**
    delete.addActionListener(e -> {
        n.delete();
        sc.close();
        sc.remove();
        getContentPane().animateLayout(800);
    });
    title.addActionListener(e -> { __**(6)**
        if(!n.isDeleted()) {
            new EditNote(n, false, this).show();
            addShowListener(ee -> {
                getContentPane().replace(sc, createNoteCnt(n), null);
                removeAllShowListeners();
            });
        }
    });
    sc.putClientProperty("note", n); __**(7)**
    return sc;
}
__1 | A note entry in the main screen is a lead component. A lead component is a unique concept to Codename One.
In it a component (in this case the title button) takes the “lead” over the Container hierarchy so all clicks within that
specific hierarchy, state changes etc. map to the button and its events. This means that clicking the text area below
| the button will act as if we clicked the button. | |
|---|---|
| __2 | The star is a toggle button with two states, which solves a lot of the complexities. We exclude it from the lead |
| component hierarchy so it can be toggled independently. | |
| __3 | The body of the note can be hidden in which case we will have two states the font size of the body can |
| be enlarged which is another special case we check here | |
| __4 | The background is set in the Container to allow the whole thing to take up the selected color. I could have |
| used a “round rect” background to look similar to the original but that design is somewhat outdated and I chose to | |
| go with the swipe container which works better with full row (it would look awkward with round borders). | |
| __5 | We wrap everything in a SwipeableContainer to allow the user to swipe the UI and see the delete button. |
| The original UI had a long press action for delete which is probably a bit outdated design wise. | |
| __6 | If the user edits an existing node instead of writing code to apply the changes we just create a new node component |
| and throw away the old node component. | |
| __7 | Client properties allow us to store meta-data within a component. This is very useful and we use that data in |
| the search method below! |
void search(String text) {
    if(text == null || text.length() == 0) {
        for(Component c : getContentPane()) {
            c.setHidden(false);
            c.setVisible(true);
        }
    } else {
        for(Component c : getContentPane()) {
            Note n = (Note)c.getClientProperty("note");
            text = text.toLowerCase();
            boolean show = n.getTitle().toLowerCase().indexOf(text) > -1 || n.getBody().toLowerCase().indexOf(text) > -1;
            c.setHidden(!show);
            c.setVisible(show);
        }
    }
    getContentPane().animateLayout(200);
}
The search method is really simple, it has a special case up front to cancel search for an empty string.
It then proceeds to loop over the components and hide/show based on the Note associated with the component.
Notice that we could have queried the component values but because the body might be hidden the hierarchy
might be slightly different so this is a simpler solution overall.
We then animate the layout to move the components into place…
Minor Tunings for the Final Result
Since the overflow menu is overly “Android oriented” I decided to move everything into the title bar area which
makes the app look better everywhere as there is space available there.
I also added a colors.xml file to allow native Android styling to use the theme colors, I just placed this file under
the native/android directory:
<?xml version="1.0" encoding="utf-8"?>
<resources>

    <color name="colorPrimary">#ffCE0A31</color>
    <color name="colorPrimaryDark">#FFB00A31</color>
   <color name="colorAccent">#800000ff</color>

</resources>
It makes very subtle differences you would mostly see while task switching.
I also made some theme refinements adding padding in the right places and fixing some fonts/colors but
nothing significant.
Final Thoughts
Porting the whole app and writing this took me 1 day during which I also did other typical tasks. I’m assuming
it would have taken longer to a person who isn’t as familiar with Codename One as I am although that person
wouldn’t need to write an article about it either…
Looking over the Android code and the corresponding Codename One code the differences are staggering.
I’m (obviously) biased but the amount of code and its complexity is significantly lower in Codename One.
The porting from Android isn’t a trivial task as it does require you to know Codename One. The process has a
lot of kinks some of which just aren’t fixable since we don’t want Codename One to venture into the complexity
levels of Android.
However, if you express interest and start filing issues/participating with the conversion wizard work that
Steve has done we will invest time and effort to match your time & effort!
This should make future iterations of this tutorial even simpler and produce far more satisfying initial results.
I’ve compared the native app side by side with the Codename One app and with the exception of the overflow
menu which could use some work, our app looks just as “native” on an Android phone.
With one simpler, shorter code base I was able to reach iOS, Android, Windows & JavaScript not to mention
desktop targets…
In this specific app I can’t see any compromises in quality/appearance or functionality. This is obviously not the
case for every app in existence but it is the case for many (most?) apps.
Discussion
Join the conversation via GitHub Discussions.