Once a build is signed you still have to get it in front of users: upload the binary, fill in the release notes, set the store listing, and send it for review — on every store where your users are. Codename One automates that last mile as a one-stop shop. From the build console you can submit a finished build to the App Store, the Mac App Store, Google Play, and Huawei AppGallery with one click, manage the store listing itself — title, description, keywords, what’s-new, screenshots — as code in your project, and produce per-store Android packages so you can reach the large Android audience that isn’t on Google Play.
Reaching those audiences doesn’t depend on, and can’t be restricted by, any single store. Google Play always receives the standard, unmodified Android App Bundle, so your Play listing follows Google’s rules exactly; the additional channels (AppGallery and other Android markets) are separate artifacts delivered to separate stores.
This chapter covers the end-to-end flow, credentials, the metadata-as-code workflow, and multi-store Android distribution. It builds on Signing: submission reuses the same App Store Connect API key the certificate wizard configures.
What it does, and what it doesn’t
Automated submission delivers the binary and applies your release metadata to an existing app on the store. It doesn’t create the app for you.
Three things are worth separating, because they happen at different times:
The app record — the listing shell in the store. Created once, manually, and exists before any build.
The binary — produced by your build, delivered when you submit.
The metadata — description, what’s-new, screenshots. Managed as code and applied when you submit. Metadata attaches to the app record and the new version, not to the binary, so there’s no chicken-and-egg problem: the app already exists on the store by the time you build.
Prerequisites
Store credentials
Apple. Submission uses the App Store Connect API key described under
the certificate wizard. If you have already run
mvn cn1:certificatewizard and stored the key, you are ready — the same key that
creates certificates and profiles also uploads builds and manages listings.
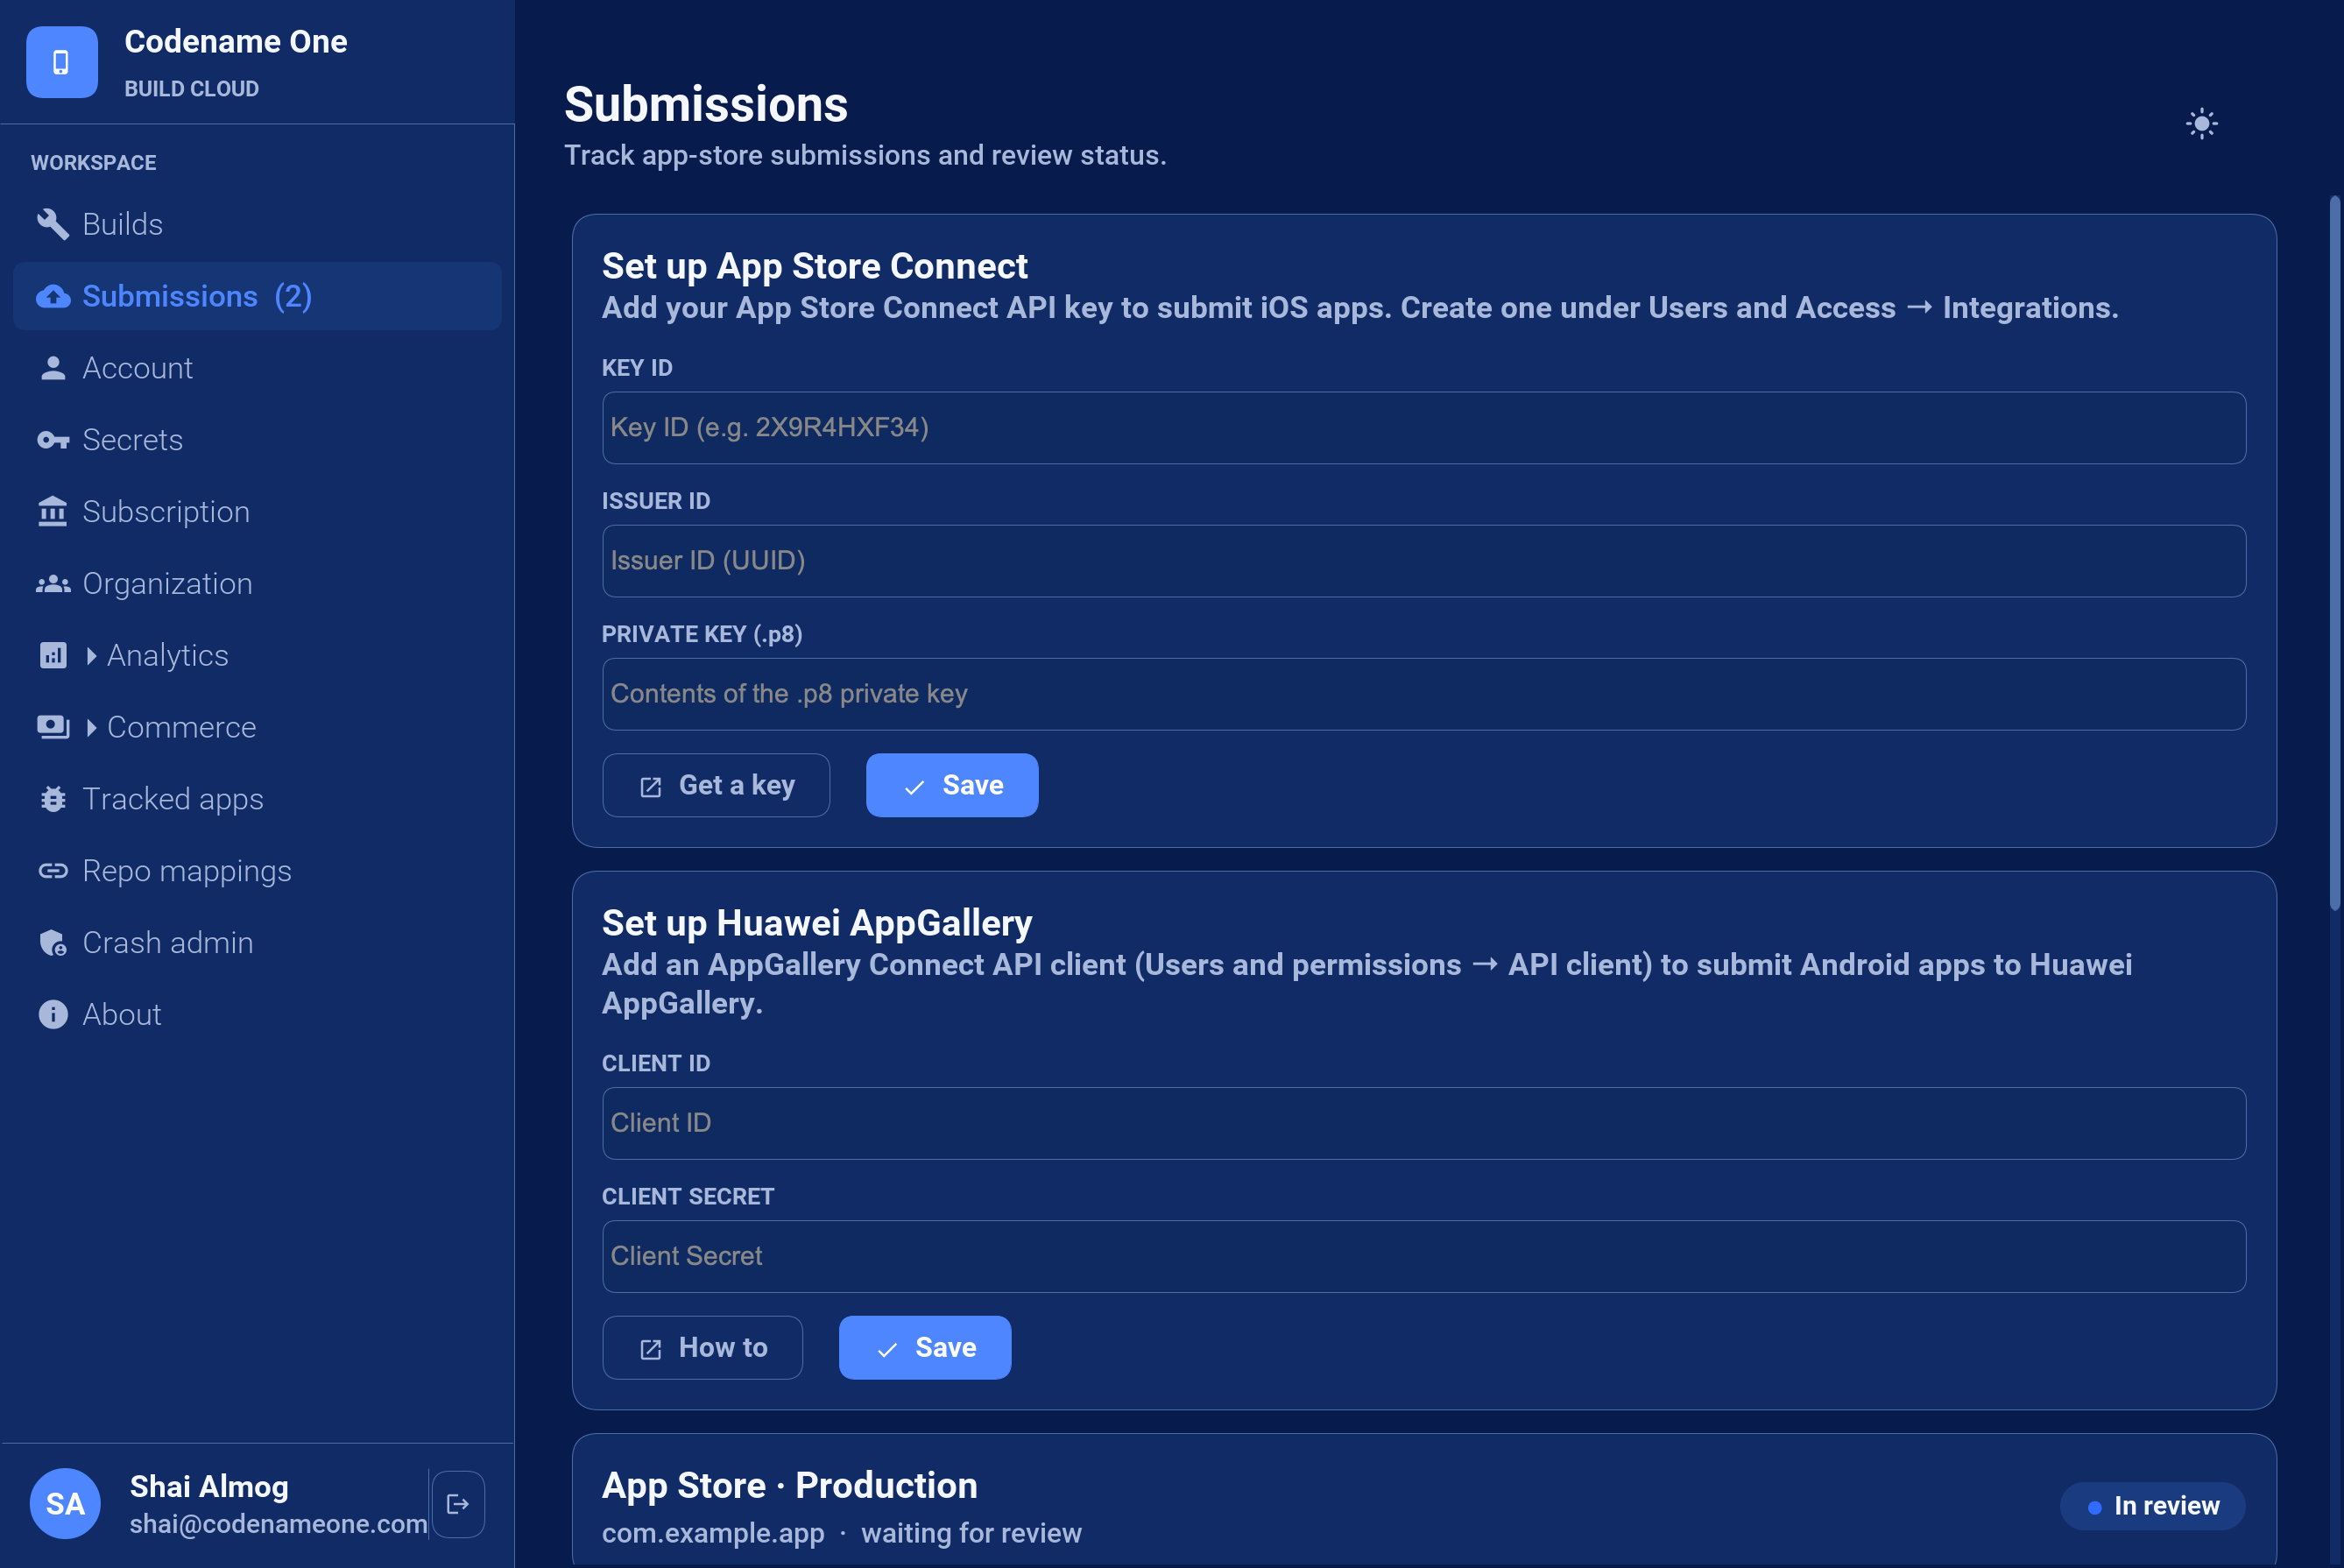
Google. Create a Google Play service account with the Android Publisher role in the Google Play Console (API access > Service accounts), download its JSON key, and add it to the build console’s submission credentials page. The console shows which stores are connected.
Huawei. In AppGallery Connect, create an API client under Users and permissions > API client and note its Client ID and Client Secret, then add them on the same submission credentials page. The app must already exist in AppGallery Connect (submission binds to the app resolved from your package name).
The Submissions page shows a connect card for each store you haven’t configured yet; fill one in and save to enable one-click submission to that store.
Beta vs production
When you submit you choose a destination. Beta means TestFlight (Apple) or the internal-testing track (Google). Production means App Store review (Apple) or the production track (Google).
Submitting a build from the console
On any successful build the console shows a Submit action for each store the build can go to:
Submit to App Store — when the build produced an iOS
.ipa.Submit to Mac App Store — when the build produced a native macOS
.pkg(see the Working with macOS chapter). An iOS build that also produced a.pkgoffers both.Submit to Google Play — for an Android build.
Submit to AppGallery — for an Android build, to Huawei AppGallery. Production sends the build for review; the beta destination uploads it and leaves it as a draft for you to promote or open-test.
The submit dialog lets you pick the destination (Beta or Production) and add release notes for this submission, then delivers the binary. For an Apple production submission the console then tracks the App Store review state (processing → in review → approved/rejected) and can email you when the state changes. Google submissions and TestFlight deliveries complete as soon as the binary is delivered.
Metadata as code
Release metadata — the store listing text and screenshots — can live in your project as a folder of plain text and image files, versioned in git alongside your code, and pushed to the stores with a single command. This makes your listing reproducible and CI-drivable: generate release notes from your changelog, push, and the next submission applies it to both stores. It’s the alternative to typing the same fields into two different web consoles by hand for every release.
The metadata folder
By default the goal reads a cn1-metadata folder next to your
codenameone_settings.properties. It’s organized by store, then locale, with one
plain text file per listing field:
cn1-metadata/
  apple/
    primary_locale.txt          (optional; defaults to the first locale)
    primary_category.txt        (optional; an App Store Connect category id)
    secondary_category.txt      (optional)
    en-US/
      name.txt                  (app name, max 30 chars)
      subtitle.txt              (max 30 chars)
      description.txt           (max 4000 chars)
      keywords.txt              (comma separated, max 100 chars)
      promotional_text.txt      (max 170 chars)
      whats_new.txt             (release notes for this version)
      marketing_url.txt
      support_url.txt
      privacy_url.txt
      screenshots/
        APP_IPHONE_67/1.png 2.png ...
        APP_IPAD_PRO_129/1.png ...
  google/
    en-US/
      name.txt                  (listing title, max 30 chars)
      subtitle.txt              (short description, max 80 chars)
      description.txt           (full description, max 4000 chars)
      whats_new.txt             (release notes, max 500 chars)
      support_url.txt
      screenshots/
        phoneScreenshots/1.png 2.png ...
        tenInchScreenshots/1.png ...
Every file is optional; a field you don’t include keeps whatever value the store
already has. The same neutral file names map to each store’s fields (for example
subtitle.txt becomes the App Store subtitle and the Google Play short
description). Fields a store doesn’t have (Apple keywords/promotional_text)
are simply ignored for the other store.
The screenshots/<dir> sub-folders are named with each store’s own type
identifiers: App Store screenshotDisplayType values (for example
APP_IPHONE_67) for Apple, and listing imageType values (for example
phoneScreenshots) for Google. Images are uploaded in filename order.
mvn cn1:metadata-init to
scaffold cn1-metadata with an empty template of the field files, a screenshots
folder, and a README, ready to fill in:+
mvn cn1:metadata-init                        # apple + google, en-US
mvn cn1:metadata-init -Dstore=apple -Dlocale=fr-FR
+ It only creates what’s missing, so it’s safe to re-run (for example to add a new locale) — it never overwrites files you’ve already filled in.
Pushing the metadata
Run the goal from your project; it authenticates with the same Codename One
account your builds use (run mvn cn1:certificatewizard once to sign in, or pass
-Dtoken=):
# push both stores from cn1-metadata/
mvn cn1:metadata-push

# or a single store
mvn cn1:metadata-push -Dstore=apple

# override the folder or the package id if needed
mvn cn1:metadata-push -DmetadataDir=path/to/metadata -Dpackage=com.example.app
The package id defaults to codename1.packageName from
codenameone_settings.properties. The goal validates every field against the
store’s limits before storing it, so an over-long name or a malformed URL fails
fast with a clear message. Wire it into CI to keep the stored listing in sync with
your repo.
metadata-push uploads the descriptor and screenshots to Codename One; it
does not submit. The stored metadata is applied to the store the next time you
submit a build for that package.When and how it’s applied
At submission time the stored descriptor is applied to the store automatically:
Apple — applied to the production App Store version (App Store review), while the version is still editable. TestFlight has no store listing, so beta Apple submissions don’t apply listing metadata.
Google — applied to the listing on the edit that publishes the binary, on any track.
Applying metadata is best-effort: the binary is delivered first, so a rejected field (say a name that’s too long, or a locale the app hasn’t enabled) never blocks the submission — it’s recorded as a warning you can see in the console, and the rest of the listing still applies. You can always fix a field by hand in the store console afterward.
Screenshots aren’t stored long-term
Screenshots are a transient pass-through: metadata-push uploads them, the next
submission delivers them to the store, and they’re then deleted from Codename
One’s servers. Keep the canonical images in your repo (that’s the point of
managing them as code) and re-push when they change. Text descriptors are retained
until you delete them, your account is deleted, or they go unused for about a year.
Per-image limits: up to 10 MB, PNG or JPEG, and at most 10 screenshots per locale and display type (the stores' own limit).
Reaching Android users beyond Google Play
A large share of Android users — most of the market in China, and many devices elsewhere — can’t install from Google Play. Reaching them means shipping to other Android stores: Huawei AppGallery, and the many app markets run by device makers and carriers (Xiaomi, OPPO, VIVO, Tencent MyApp, Baidu, 360 and others). Codename One makes your app available on those stores without changing how you build or locking you to any of them.
Huawei AppGallery is a first-class submission target, exactly like the App Store or Google Play (see Submitting a build above). For the remaining Android markets, Codename One produces distribution-channel packages.
Distribution-channel packages
Most of these stores accept a plain, self-signed APK rather than an App Bundle, and they attribute each download and its revenue to the store it came from. A distribution-channel package is your signed release APK stamped with a store identifier — one APK per store, all built from the same release.
You choose the stores; the build produces one package per store, each carrying its
channel id. Your app reads that id at runtime with
Display.getInstance().getProperty("DistributionChannel", "") — an empty string
for a normal Google Play build — so you can report the install source (to your own
analytics or the store’s) without adding any third-party channel SDK. Codename One
writes the id and reads it back for you.
Sensible defaults keep this simple: enable it and you get packages for the major Android markets out of the box, and you can narrow or extend the channel list to match the stores you actually publish to. Each package is signed with your app’s release key, so every store receives a signed, installable APK.
Benefits over editing the stores by hand
Managing submission and metadata through Codename One pays off most for teams, frequent releases, many locales, or many apps:
Automated release notes. Generate what’s-new from your changelog and ship it to both stores on every release — the one field that always changes.
One source, two stores. A single descriptor fans out to App Store Connect and Google Play, which have different fields and limits.
Reproducible and reviewable. The listing lives in git, versioned and code-reviewed like everything else. Console edits have no history.
Localization at scale. Localized listings are just files, and can be generated or translated in a pipeline.
Fewer console logins. Team members who ship releases don’t each need App Store Connect or Play Console access; they ship through the build pipeline instead.
For a single app with infrequent updates, editing the store console by hand is fine — the payoff scales with how often you release and how many listings you maintain.